Draw a Circle in Gimp 2.8
If you're using a photo editing app similar GIMP then drawing bones shapes (such as circles) may seem a scrap perplexing at showtime. This is because GIMP isn't meant for creating shapes like a vector design app is. However, it tin can still exist done, and with relative ease too! In this tutorial nosotros'll exist going over two dissimilar ways in which yous tin describe a circumvolve in GIMP using the Ellipse Select Tool.
In short, the way to depict a circumvolve with GIMP is to use the Ellipse Select Tool and click and drag on your canvas to create a selection in the shape of a circle. Then, you'll be able to fill that circle with whatever colors, patterns or bitmaps yous'd similar. Let's demonstrate how.
Draw A Circle In GIMP
The following video tutorial volition walk you lot through the entire process in simply 2 minutes:
Keep on for the written tutorial.
Step 1: Activate the Ellipse Selection Tool
In society to depict a circle in GIMP we will need to use the Ellipse Select Tool. This tool allows you to create selections on your canvas in the shape of ellipses and circles.
Yous tin locate the tool in your toolbar:
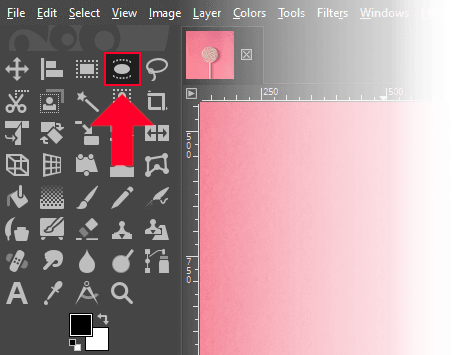
Alternative, you can use the keyboard shortcut, which is the letter E.
Footstep 2: Click and elevate to draw a circular selection with the tool
With the Ellipse Select Tool enabled you can now click and drag on your canvas to create a option.
In its default mode, the tool will permit you to draw ellipses that follow your mitt movement:

Holding the Shift fundamental while clicking and dragging will allow you to draw a perfect circle:

Holding both Shift and Control will draw the circumvolve from the center point, starting where you lot clicked, every bit opposed to the opposite corner:

Alternatively, in that location'south a setting in the tool settings carte du jour for the Ellipse Select Tool that forces the tool to draw only perfect circles. Merely check the box that reads Stock-still:
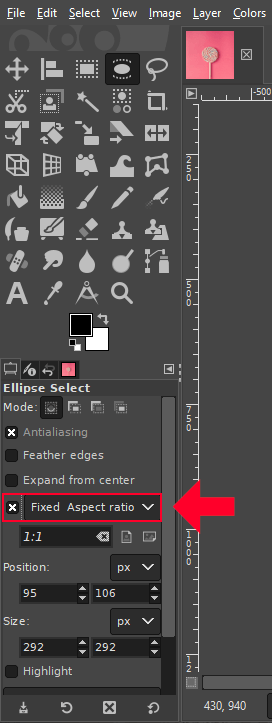
Make sure that you have the aspect ratio fix to 1:1 otherwise you won't be able to describe a circumvolve in GIMP without holding Shift. And exist sure to deselect this setting in one case you are finished otherwise GIMP will exit it enabled until you do.
Once you take these settings in place you will be able to draw a perfect circumvolve by default and without having to hold the Shift central.
Once you lot are finished drawing your circle y'all can release the click and any keys yous may be using besides. The resulting circle will be depicted every bit a single dotted marquee.
Step iii: Make full the choice with a color to complete information technology
Upwardly until this bespeak we've simply demonstrated how to create a selection in the shape of a circumvolve. In order to make this selection a proper circle we will take to fill it with something.
Y'all can fill up your circle with virtually anything you'd like, including:
- Solid colors
- Gradients
- Patterns
- Textures
- Images
- And more
For this demonstration nosotros volition exist filling the circle with a solid fill color.
Click on the Foreground Colour to open up the color picker bill of fare and choose a color for your circle:
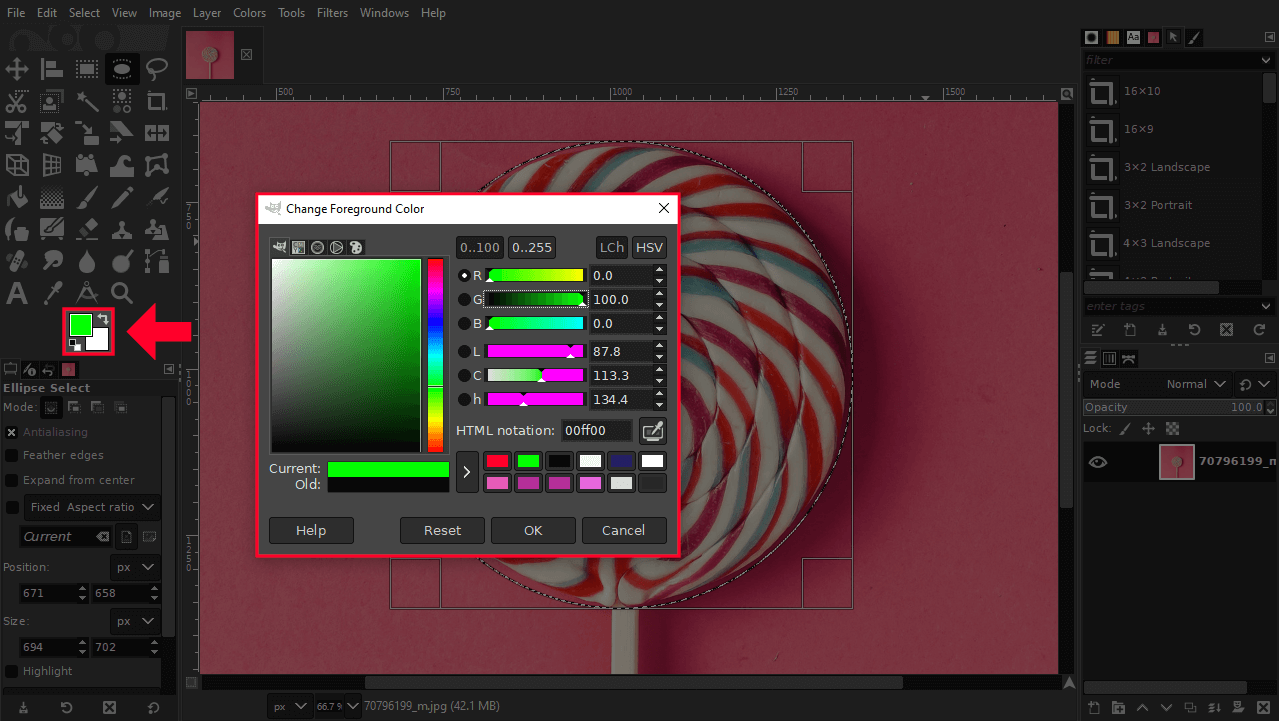
Once you are finished all you have to do is click OK and then click and drag the foreground colour inside of your selection and release it:

This will fill your circle with the selected color.
Tip: you can add together an outline around your circle instead of filling it past using the Stroke Selection tool in the Edit menu.
Once yous are finished filling/outlining your circle, but release the choice by going to:
Select > None
Or yous tin can apply the keyboard shortcut: Shift + Control + A
This will remove the marquee (or dotted line) from your circle and you lot are finished!
Decision
Although GIMP isn't necessarily designed for drawing shapes, information technology'southward still possible, and it's easy enough to do that there'southward no need to launch other applications if all y'all demand to do is describe a circle in GIMP for example. Cheers to the pick tools, drawing common shapes (such as circles) is non only possible, but besides quite efficient!
If you lot have any questions or demand clarification on whatsoever of the steps taken in this lesson then please leave a annotate below.
Become A Principal Of GIMP!
Want to acquire more nigh how GIMP works? Check out The GIMP Series – a comprehensive collection of over sixty videos where I go over all of the major tools, features and functions in GIMP and explain what they do, how they work, and why they're useful.

Become A Master of Adobe Illustrator!
Want to acquire more than near how Adobe Illustrator works? Bank check out my Illustrator Explainer Series - a comprehensive drove of over 100 videos where I become over every tool, feature and part and explicate what information technology is, how information technology works, and why information technology's useful.
Logos Past Nick LLC is a participant in the Amazon Services LLC Associates Programme, an affiliate advertising program designed to provide a means for sites to earn advertizing fees by advertising and linking to Amazon.com. As an Amazon Associate I earn from qualifying purchases. Read affiliate disclosure here.
Source: https://logosbynick.com/draw-a-circle-in-gimp/
0 Response to "Draw a Circle in Gimp 2.8"
Post a Comment